
I am back at the '62 Oldsmobile, this time finishing the last rust areas and a leaded area that started bubbling. The passenger rear corner had bulges in the lead applied to cover the overlap seams where the rear corner piece meets the 1/4 panel. The factory did this the same way after spot welding the panels together. This particular area was redone when a new entire 1/4 panel was attached sometime early in the car's life. The liberal use of lead indicates this to me.
The body man attached this area of panels with brazing and sheet metal screws, with welding elsewhere. Then the seams were covered with lots of lead. I would never have messed with this area, but here is where the lead was bubbling. After removing lead from the seams I found pockets where something didn't get along with the lead and steel living together. I wonder if it was a sort of oxidation, impurities in the lead, or the steel base not being totally prepared.
 So I began to remove all of the lead with careful heating, pushing soft blobs away and wiping the wet lead with a rag. The lead used seemed extensive; I also didn't want to put lead back onto a not-so-perfect seam full of crevices and overlap, being afraid that no matter how clean I get it, there would likely be remaining impurity issues. I didn't want the bulges to reappear after I finish this car. So I decided to remove the overlap areas entirely, and weld new sheet metal patches level with the outer area.
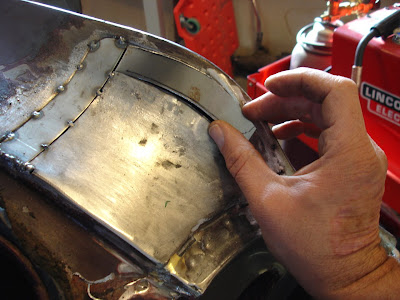 Forming little pieces was not difficult, as I had a nice pattern to follow. The curves were very easy since the patches were so small, only requiring using my hand and pliers to shape them. The main reason I made one small patch (and attached it) at a time was to keep the overall shape of this panel in line. This helped me avoid moving the middle panel out of alignment with the shape it needed to follow.
 This is the only time I needed any other tool than my hand held pliers. I just needed a little bend on the brake.
 Second to last piece being fitted for trimming.
 Careful grinding, filing and a little picking with the body hammer left the pieces pretty smooth. Now I can use a little bit of filler and the area can be fully cleaned/scuffed for adhesion. No lead needed, either.
 Not too bad!
 Here's an area under the pass. door where I needed to make a new patch. The brake, stretcher and hammer-on-anvil were used for this little patch. Welds still look nasty, just waiting to be carefully ground smooth.


